Belly Dance Topeka
  • Class Information
  • Belly Dance for Every Body
    • BDfEB Level 1 >
      • Horizontal Circles
      • Sagittal Circles
      • Vertical Circles
    • BDfEB Level 2
  • Student Resources
    • Beginner Resources
    • Intermediate Resources >
      • Beginner moves
      • Group Improvisational Cabaret
      • Half-Circular Veil Session
      • Saidi Cane
      • Skirt Session
      • Vertical 8s
    • Advanced Resources >
      • Advanced Moves
      • Balance & Floorwork
      • Balancing Technique
      • Choreography Creation
      • Drum Solo Technique
      • Fans
      • Fast Songs
      • GIC with Zils
      • Layers
      • Locks, Pops, Stutters & Shimmies
      • Slow Songs
      • Solo Improvisation
      • Turkish Roman
    • Articles >
      • Belly Dance and Pregnancy
      • Belly Dance and Yoga
      • Belly Dance DIY >
        • Chain Belt
        • Chain Neckalce
        • Easy Post Earrings
        • Feather Fan Carrying Cases
        • Fringe Hip Scarf
        • Half Circular Veil
        • Hair Stick
        • Square Mini-skirt
        • Stabilize Feather Fans
        • Two Panel Skirt
      • Belly Dance in 3D
      • Choosing a Veil
      • Finger Cymbals >
        • Finger Cymbal Glossary
      • Online Learning Resources
      • Shoes - Yes or No?
      • Styles of Belly Dance
      • Understanding Middle Eastern Music >
        • Basic Music Theory
        • 4/4 Rhythms
        • 8/4 Rhythms
        • 2/4 Rhythms
        • Odd Rhythms
      • Using DVDs in Your Dance Practice
      • What to Keep in Your Dance Bag
      • Why Attend Workshops
    • Book Recomendations
    • DVD Recomendations >
      • Arms DVDs
      • Beginner Level DVDs
      • Belly Dance Styles >
        • General Cabaret Technique DVDs
        • Group Improvisation Tribal DVDs
        • Gypsy Skirt Technique
        • Tribal Fusion DVDs
      • Choreography DVDs
      • Finger Cymbal DVDs
      • Floorwork DVDs
      • Other Dance Styles >
        • Burlesque DVDs
        • Flamenco DVDs
        • Pacific Island Dances
      • Performance DVDs
      • Pops Locks & Shimmies DVDs
      • Prop DVDs >
        • Fan DVDs
        • Other Props
        • Sword & Balance DVDs
        • Veil DVDs
      • Rhythms DVDs
      • Salimpour Format DVDs
      • Workout DVDs
      • Yoga
    • Music Recomendations
    • Newsletters
    • Strengthening Exercises
    • Technique Drills and Challenges >
      • 3/4 Shimmy Drill
      • Grapevine & Bicycle Hip Combo
      • Hip Circle Challenge
      • Maya Rollup
  • Private Lesson & Other Class Rates
  • Workshops
    • Accessorize Your Bedlah
    • Bead Your Bedlah >
      • July 19, 2014
  • Performance Rates
  • About Huraiva
  • About Belly Dance Topeka
  • About Hathor's Hips
    • Troupe Membership
    • For Troupe Members >
      • Troupe Costuming
      • Repertoire >
        • 9/8 Group Improv
        • Aahat
        • Alf Leyla Wa Leyla
        • Arabesque
        • Bel Arabi
        • Crystalize
        • Disco Improv
        • Dream
        • Hoplanda
        • Mermaid's Tears
        • Pandora's Fire
        • Saiidi Cane
        • Shimmy Shimmy
        • Short Belly Dance Drum Solo
        • Tabla Solo 2
        • Warda
        • Yearning
        • Zeina
      • Online Learning Resources
  • Contact Belly Dance Topeka
  • Dancing Kitten Designs
Contact Huraiva

Triangular Hip Scarf with Fringe

Start with one yard of fabric (You could get less fabric if you wanted a hip scarf that wasn't as long). Fold it in half to make a rectangle such that the width of the fabric is halved (the salvages should meet). Cut from one corner (where the edges meet) to the other corner (the fold). I usually cut a straight line, but you could shape it if you wanted something other than a triangle.  When you open it up you should have a triangle that is approximately 36” from the hips to the bottom of the point and the width of the fabric around the hips. Use the left over triangles (the part you cut off) 
Picture
Picture
to make ties. Whatever width you like, I usually go with about an inch and a half) and however long you prefer (mine are usually 18 inches or so, I like lots of fabric for tying.

Pin the ties and the triangle together such that the part that goes around your hips and the top of the ties make a straight line. Then sew back and forth along that seam – I usually sew it 3 or 4 times to make sure it is strong enough considering how tight I tend to tie my hip scarves. Next fold and pen the hem all the way around the hip scarf, up both sides of the triangle, along both ties and across the top. Then sew the hem using a straight stitch.
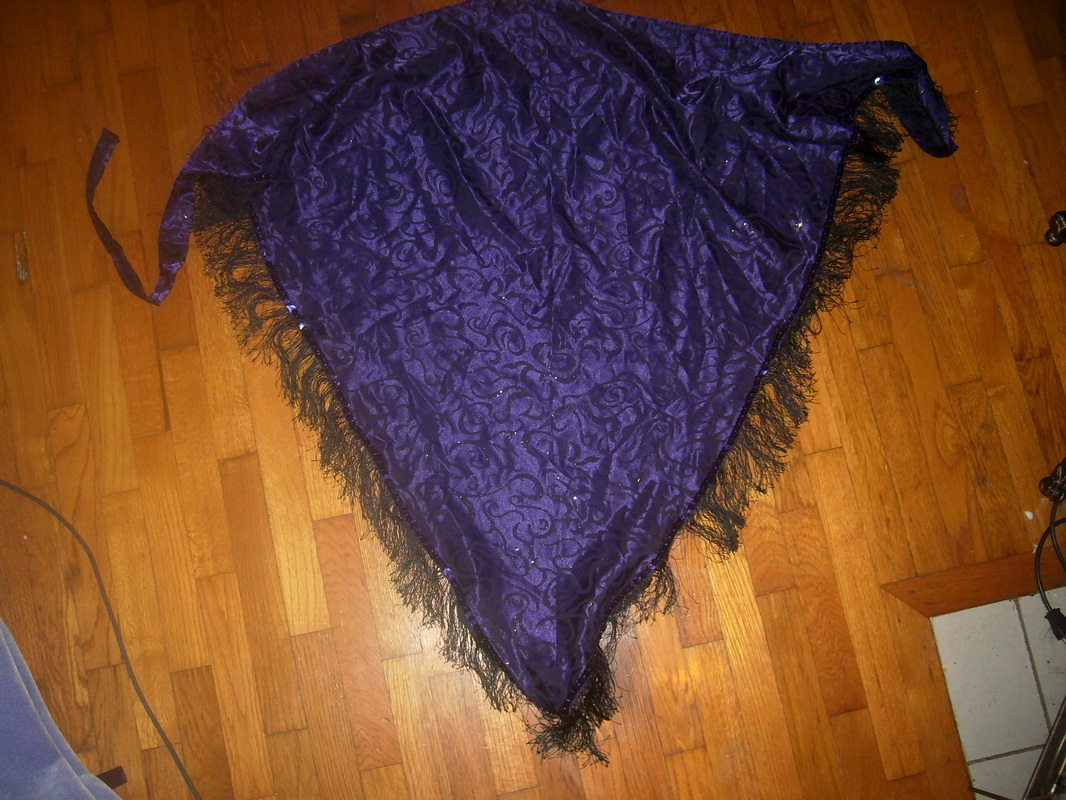
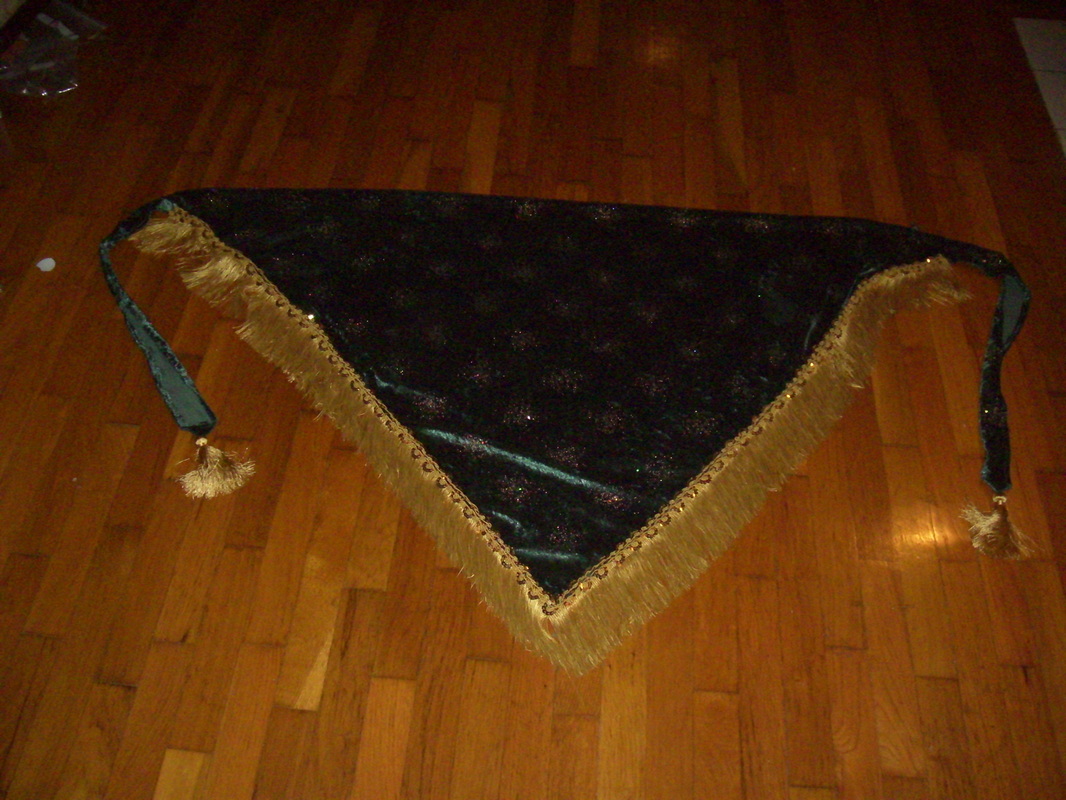
Next, pin chainette or beaded fringe to the underside, along the edges of the triangle. The amount you will need will vary depending on how wide your fabric was and how long you decided to make the scarf, also whether or not you want fringe along the top edge or just along the bottom two edges of the scarf. If you are using chainette fringe or beaded fringe that is on a ribbon, you can then machine sew the fringe on using a zigzag stitch. If you are using beaded fringe that is on a shoestring then I suggest hand stitching the fringe with a stitch between each strand of beads.

Once the fringe is on, you can be done, or you can add additional decorations. I like to sew tassels onto the ends of the ties and sequined trim or braid along the edge of the triangle, both of which will most likely need to be added by hand sewing. The above instructions will also work if you get the coin trim on a ribbon. However, individual coins or sequins require a different technique.
Disclosure: Belly Dance Topeka is a participant in the Amazon Services LLC Associates Program, an affiliate advertising program designed to provide a means for sites to earn advertising fees by advertising and linking to amazon.com

Refund Policy: No refund on digital downloads. Physical items purchased directly from Huraiva may be returned within 30 days for a refund of purchase price minus any shipping and paypal fees.